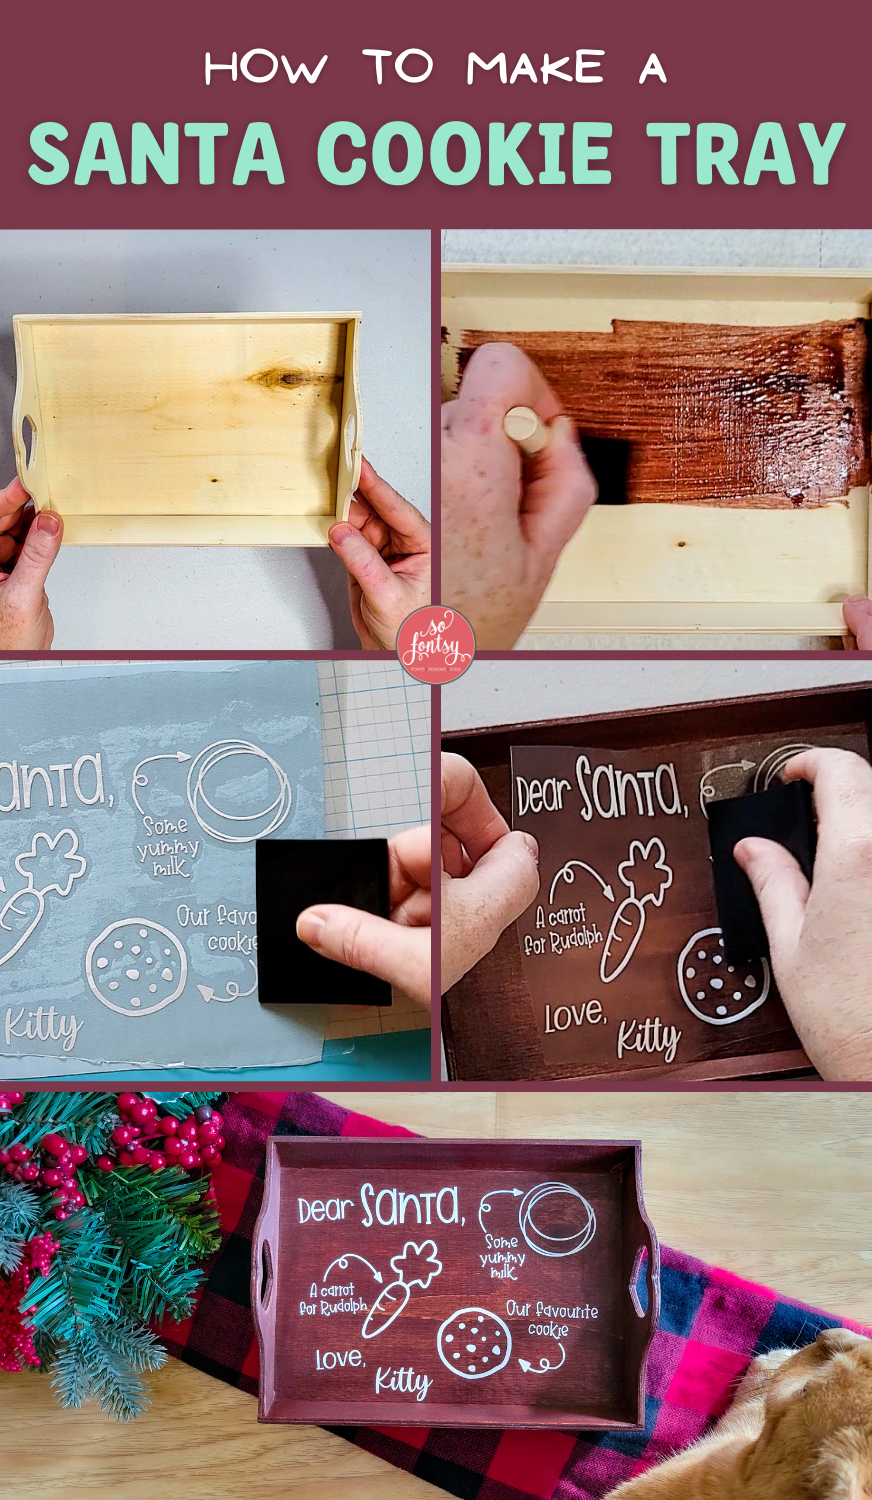
How to Make a Santa Cookie Tray
Bundle promotions in this post have expired - you can find the design we used HERE.

This tutorial will show you how to create your own Santa cookie tray!

The Santa cookie tray design we're using for this project is from the Farmhouse Christmas Font and Design Bundle.

All you need to do in your design software is to use your favorite font to add your name.
We used the Holiday Wishes handwritten script font also found in the Farmhouse Christmas Font and Design Bundle.

Use your cutting machine to cut the design out of adhesive vinyl.
Weed the excess vinyl from around the design.

Transfer the design to transfer tape.

Cut around the design.
Set aside for application after finishing the tray.

We are using this wooden tray from the Dollar Tree. They make awesome mini Santa cookie trays!

We stained the tray with a water-based stain which is easy to apply and clean up.

If you stain the tray, then you'll need to seal the wood.
We recommend sealing the tray whether it's painted or stained. The adhesive vinyl will stick better to the sealer than the paint.

Place the design centered on the tray and apply the vinyl using the hinge method. Burnish vinyl really well.

Please note: this tray is used for design purposes only and not intended to be used with food.

You can grab the design for the Santa cookie tray in the Farmhouse Christmas Font and Design Bundle.

Watch the project timelapse video below:
PIN it for later: