
How to Adhere Small Cardstock Die Cuts to Paper Projects
One of our favorite features of using a Silhouette Cameo, Cricut, or ScanNCut, is their ability to cut out small shapes in card stock.
In this tutorial we will show you how to easily adhere small cardstock die cuts to your paper projects (without getting glue all over the place).


In this scrapbook page, we are using the "Sun, Sand & Waves" text from a retro sunset SVG, part of the Retro and Vintage Design and Font Bundle.

This hack uses Stick It Adhesive sheets, which are very thin sheets of double-sided tape.
Cut a piece of Stick It Adhesive to the size of the cardstock you will be using for your letters.

Peel off one side of the Stick It adhesive sheet (one side of the backing has slits in it to more easily remove it).

Then, apply the adhesive sheet to the back of your cardstock.

Next, put the piece of cardstock onto your machine's cutting mat with the Stick It adhesive sheet facing down.
We are using the Silhouette Cameo 4 for this project but you can use this trick with your Cricut or Scan N Cut, too!

Cut out your design. The Stick It Adhesive sheet is very thin, but we recommend that you do a test cut to ensure you have the right cut settings.
Remove the excess cardstock from around the design.

Now remove the design (or one part of it) from the cutting mat. For very small pieces, a pair of tweezers is very helpful.
Flip over the die cut and you'll see the other side of the paper backing from the Stick It adhesive.
Remove the Stick it adhesive is now applied to the back side of the cardstock die cut.

Adhere your sticker backed letters to your paper project!

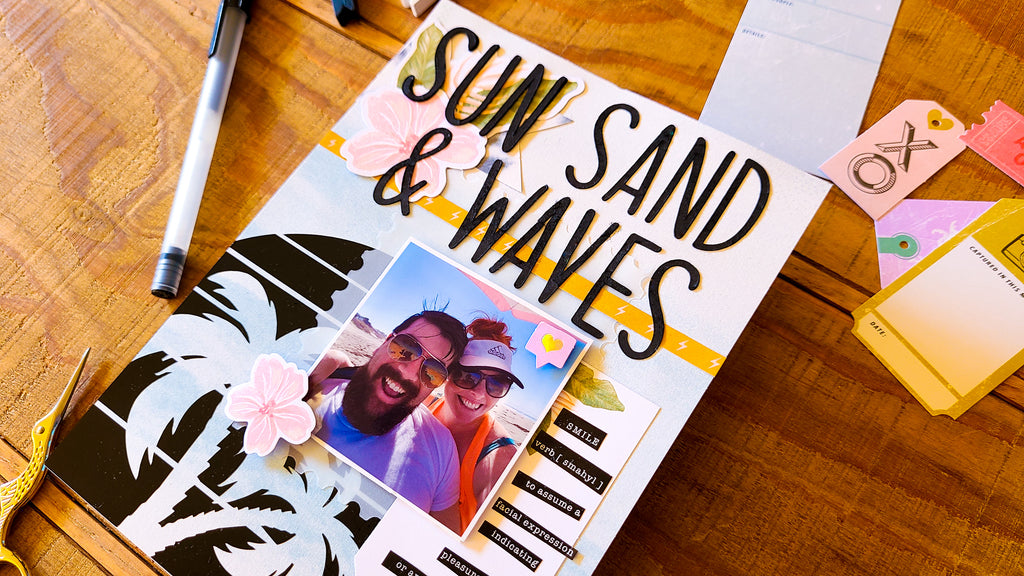
Find the sunset design and text used in this scrapbook page in the Retro and Vintage Design Bundle!

Watch the project's timelapse video below:
Love it? PIN it:


