
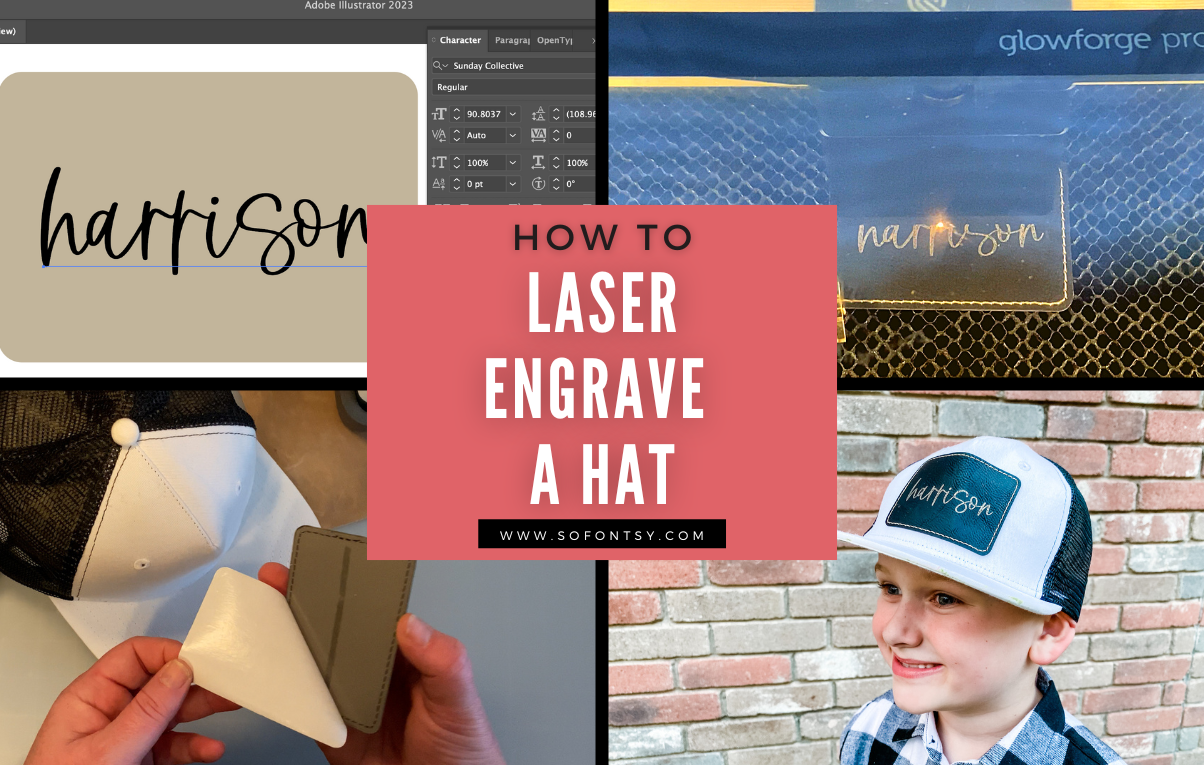
How to Make a Laser Engraved Leather Patch Hat
Add some personality to your child's hat with a laser engraved leather patch! This easy tutorial will show you how to set up a font in Adobe Illustrator, engrave leather on a Glowforge and attach the patch to the hat.
Materials Needed:
-
Laser-safe Leather Patch
-
Hat
Tools Needed:
-
Adobe Illustrator (But you can use any vector editing software.)
-
Laser Engraver
-
Cricut Mini Press
First, you will want to open up your vector editing software and create a box the size of your patch. For this tutorial I will be showing how to prepare your font for engraving in Adobe Illustrator, but you can use any vector editing software such as Silhouette Studio or Inkscape. 
Next you will choose your font, I chose Sunday Collective from the Premium Font Bundle! It has 53 fonts for 93% off!

After that it is time to make this font laserable. Create your text box, add your personalization and then select the font, click object>expand>okay.

After you expand the font (if it is a script) you will see parts that overlap. In order to remove this overlap you will want to use the Pathfinder menu and 'unite'. In the photo you can see the difference between the top name (start) and the bottom (after united) name.
Note: If you do not unite the name and leave it like the top photo the overlapping parts will make a void in the engrave.
When it is ready for engraving, you can file>save as an SVG.
Open up your Glowforge Software and drag and drop the saved SVG into your canvas. I like to at this time check that the measurements are correct and adjust if needed.
Pin the leather patch down in the center of your laser machine bed.
Set the name to engrave and the rectangle to ignore. It is very important to set it to ignore because you do not want it to engrave or cut. I used the settings 500 speed, 8 precision power, and 270 LPI with Auto Focus. Note: Each laser is different and may need slight adjustments. Then Print.
Once it is engraved pull it out of the laser bed and remove the backing and position on your hat blank.
Once you are happy with the placement you will use your Cricut mini press and a piece of teflon to protect the leatherette patch. On high heat setting with a good amount of pressure. I found placing the cap on a pot works well for allowing you to give enough pressure.
So there you have it, your very own laser engraved patch for a hat. We hope you enjoyed this tutorial and are now inspired to create your own personalized patches. Be sure to share pictures of your finished product with us on social media. And most importantly, what font will you be putting using on your hat? Let us know in the comments!
 Don't forget to grab the Premium Font Bundle with 53 fonts for 94% off while you can! Then let us know what font you'll be putting to use on YOUR hat in the comments below!


