
DIY Waterslide paper Glass Can | Great gift for Dad
Looking for the perfect gift for dad? Look no further than this awesome DIY Waterslide Paper Glass Can! Thanks to some simple materials, a bit of time and a little know-how, you can make something that dad can proudly show off to all his friends.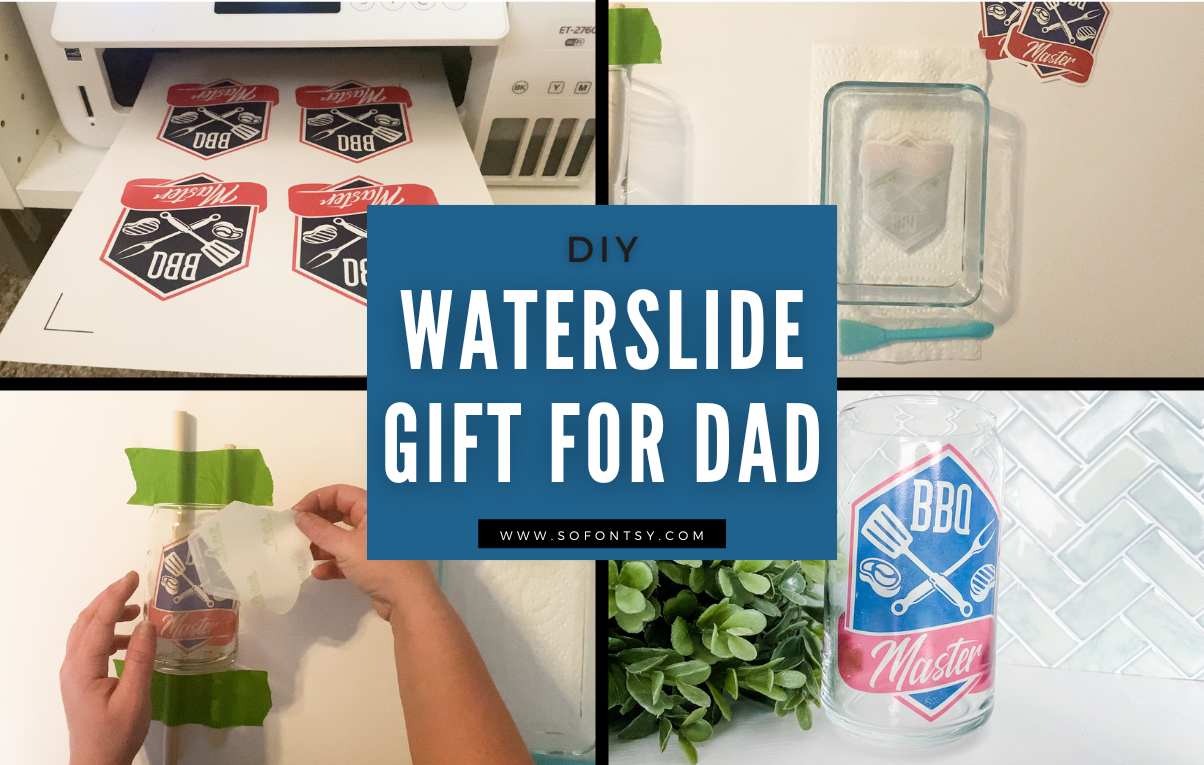
First you will want to choose your design, I chose a Glass Can design from the Glass and Tumbler Sublimation Bundle. In this bundle you will get over 140 designs for 90% off! What a great deal that is!  After you choose your design import it into Silhouette Studio and make sure it is sized to fit your blank. After that, I duplicated the design (just in case I needed to revert back to the original) and clicked 'release the compound path' of the duplicated design.

I only want to use the center of this design with the waterslide paper so I deleted the outside of the design. 
 Then I selected all of the remaining black parts and clicked 'make compound path'.

We are left with the middle.
 I added an offset around the middle of the design it can be used for Print and Cut.
  Release your compound path of your offset to be able to remove the inside portions of the offset.


 Then, I aligned the design and the offset to put them back in the right spot related to each other.
  Next I changed the color of the offset to white and removed the red line color. This is so these colors won't print.
 I fit 4 of my designs into my page with registration marks turned on so I had extras just in case!
  Then, I printed on the waterslide decal paper.
 Once the paper was printed and dried thoroughly, I sprayed it with Bull's Eye Shellac 3 times, allowing time to dry between coats.
  After the shellac is fully dried, load back into Silhouette Studio for the cut. Selecting 'cut edge' will cut the outside of the design.
  Soak the cut decal in water for 60 seconds.
  Then, I used a spray bottle to add water to the surface of my glass and began transferring it slowly to the glass. You do this by making sure the paper behind the decal is very wet and slowly slide the paper backing off as you place it on the cup. This process takes patience! Make sure you are not forcing anything as you do not want the decal to tear. I also used a silicone tool to slowly remove any air bubbles.

After the decal/glass is dry it is time to place it in the oven to cure. You do this at 330 for 15 minutes. With this DIY Waterslide Paper Glass Can project, you've got a great gift for dad that will be the envy of all his friends. Not only is it great-looking, but dad can proudly show off that it was made by your own two hands! So don't wait - surprise Dad with this cool and creative gift today!

So what are you waiting for grab the Glass and Tumbler Bundle, some waterslide paper and get started today!

Watch the video here:
Pin it for later!


