Cricut Design Space: How To Turn an SVG into Print Then Cut
Cricut Design Space: How To Turn an SVG into Print Then Cut
Print Then Cut allows you to print your design and then cut the outer edge.
It works by first printing your image via your printer. Your Cricut Maker (or Explore) then reads the registration marks on the paper you just printed and cuts around the design accordingly.
It's a fantastic feature for creating printables, stickers, wall art & more. Let's learn How To Turn an SVG into Print Then Cut.
Let's learn a little about the Print Then Cut feature of Cricut Design Space. ---> Then we will move on to our tutorial.
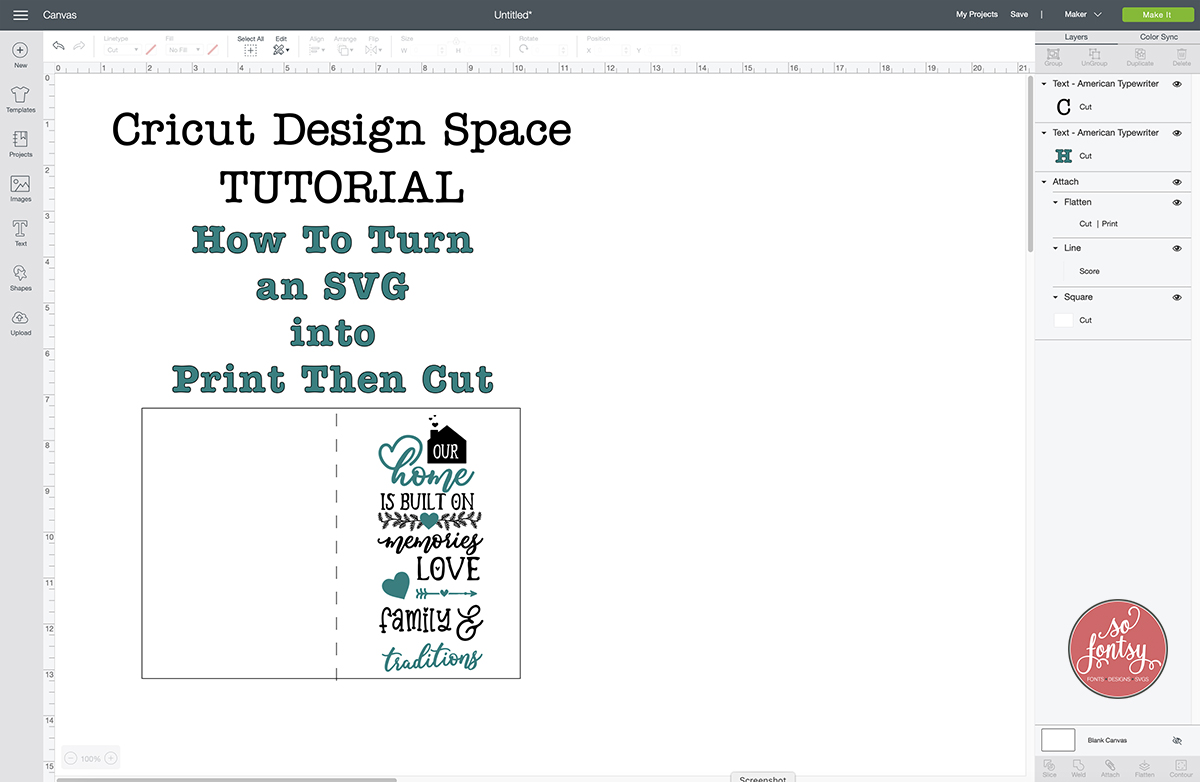
What size design can I use with Print Then Cut?
The Cricut Design Space Print Then Cut maximum size of the design you can print is 6.75" wide by 9.25" high.
It needs to be printed on 8.5" x 11" letter size paper, with your printer settings set to print at "actual size."
Which Cricut Machine can I use for Print Then Cut?
The Cricut Maker can be used for Print Then Cut. It's sensor is powerful and will read the registration marks from your printed design much easier and on a variety of materials including colors.
The Cricut Explore can be used for the Print Then Cut feature on white or off-white, matte paper only.
IMPORTANT TIP: Please keep in mind that you cannot use Print Then Cut with dark or heavily, patterned materials as the sensor cannot read the registration marks.
What image file type do I need to use for Cricut Print Then Cut?
Today we are going to use an SVG file, which is the easiest way to use the Print Then Cut feature. With an SVG file you can change the colors of each layer and customize the design to be printed the way you choose. For future reference, you can use any image that can be uploaded to design space (including JPG & PNG).
Some helpful tips:
- Be sure to Calibrate your machine before using Print Then Cut. This helps align the sensor properly for the best performance. You can read more about calibrating your machine HERE.
- Use an inkjet printer.
- For this tutorial we are cutting our design out of medium weight card stock. If you want to use vinyl for Print Then Cut, you will need to use Printable Vinyl, which you can find HERE.
- If you are having issues with the light sensor on your machine, visit this helpful article on Cricut.com.
Time for a quick tutorial! Let's learn How to Turn an SVG into a Print Then Cut design using Cricut Design Space.
- Open up a new canvas and upload the image you'd like to use.
I am using the Our Home is Built On SVG Cut File from the December 2019 Bundle - which includes 122 designs, 15 (yep, 15!!!) fonts & 24 digital papers at 93% OFF!
- Resize the image so it's within the maximum size of 6.75" x 9.25". I changed this design to 9.25" high.
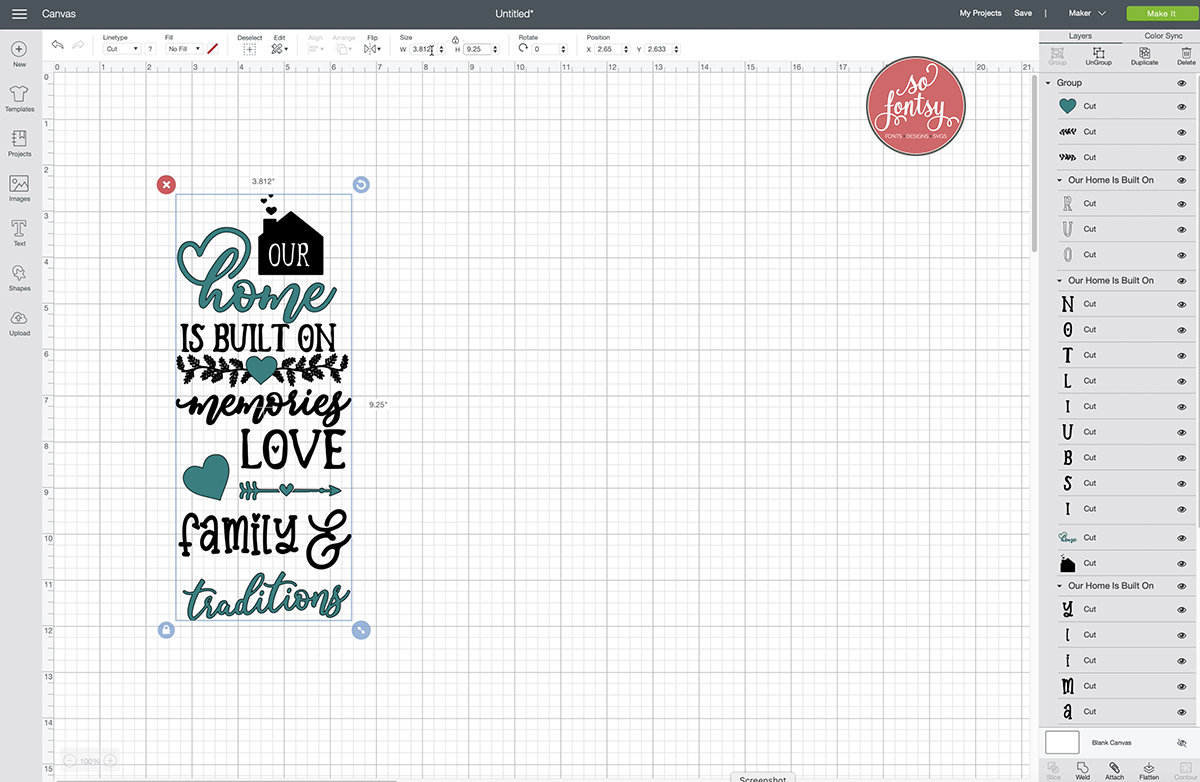
Select all of the layers and click FLATTEN in the bottom right hand corner.
This changes the layer to a Cut | Print layer.
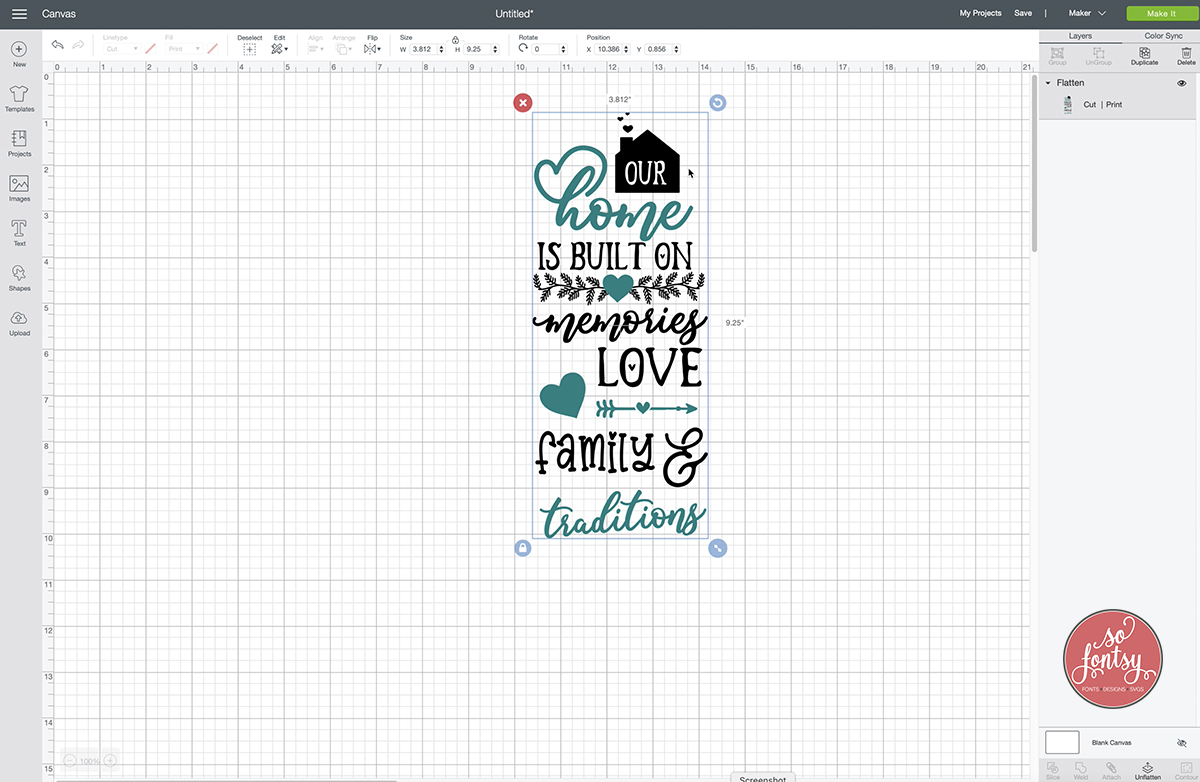
Now let's create a shape for our card.
Select a square shape, unlock the dimensions and change it to 7" wide by 5" high.
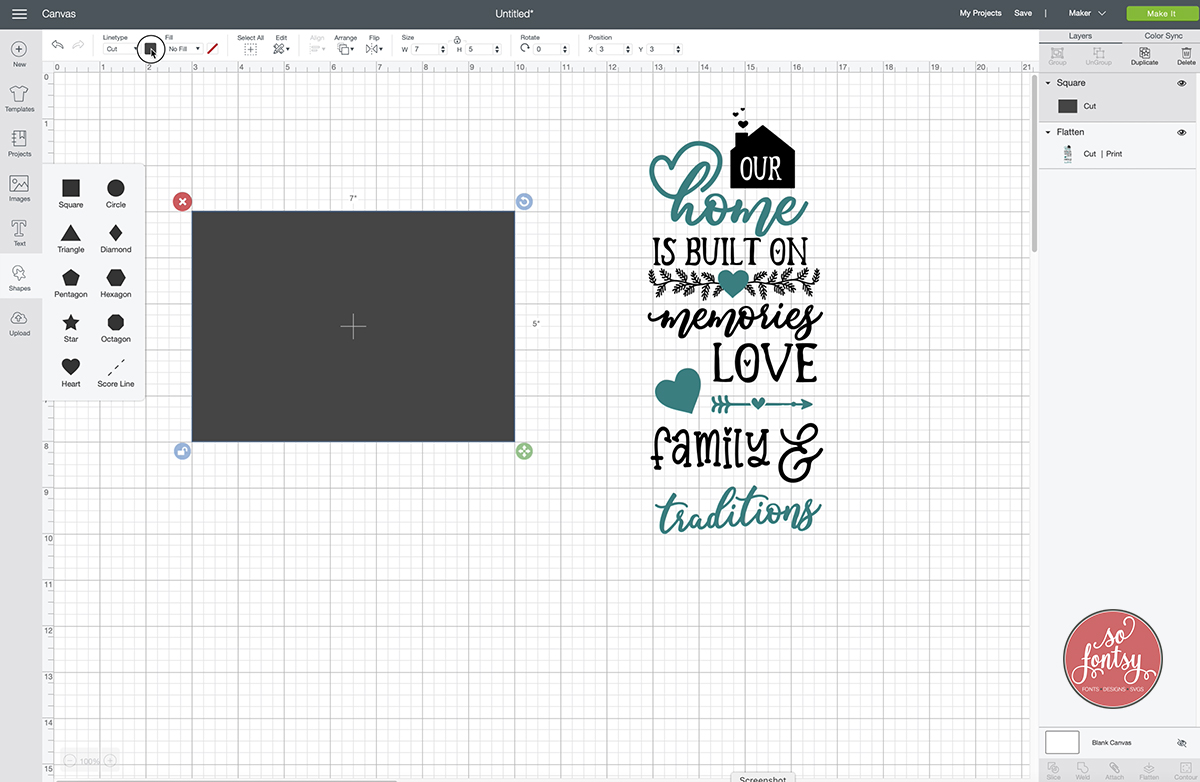
Change the color of the rectangle.
Now click shapes & add a score line.
Make the score line 5" high.
Select the rectangle & score line layers and click ALIGN: Center.
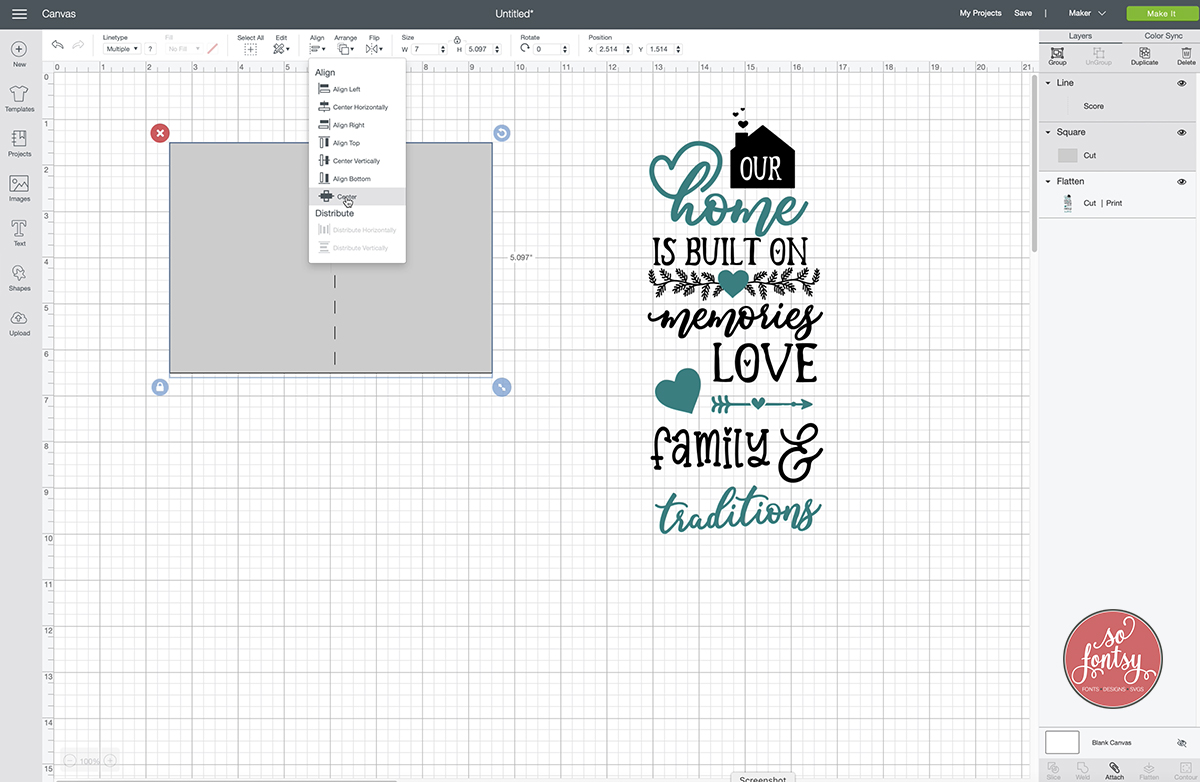
Resize & place the flattened print design layer to the front of the card & make sure it's centered on the front panel.
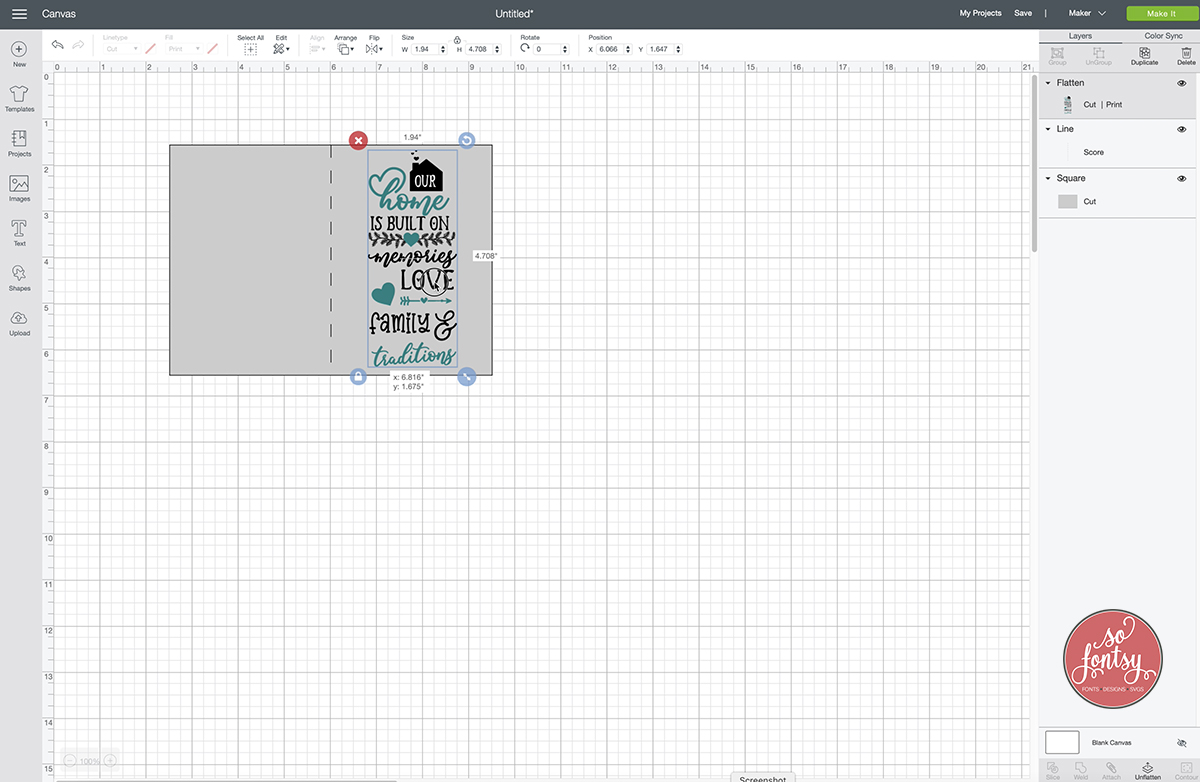
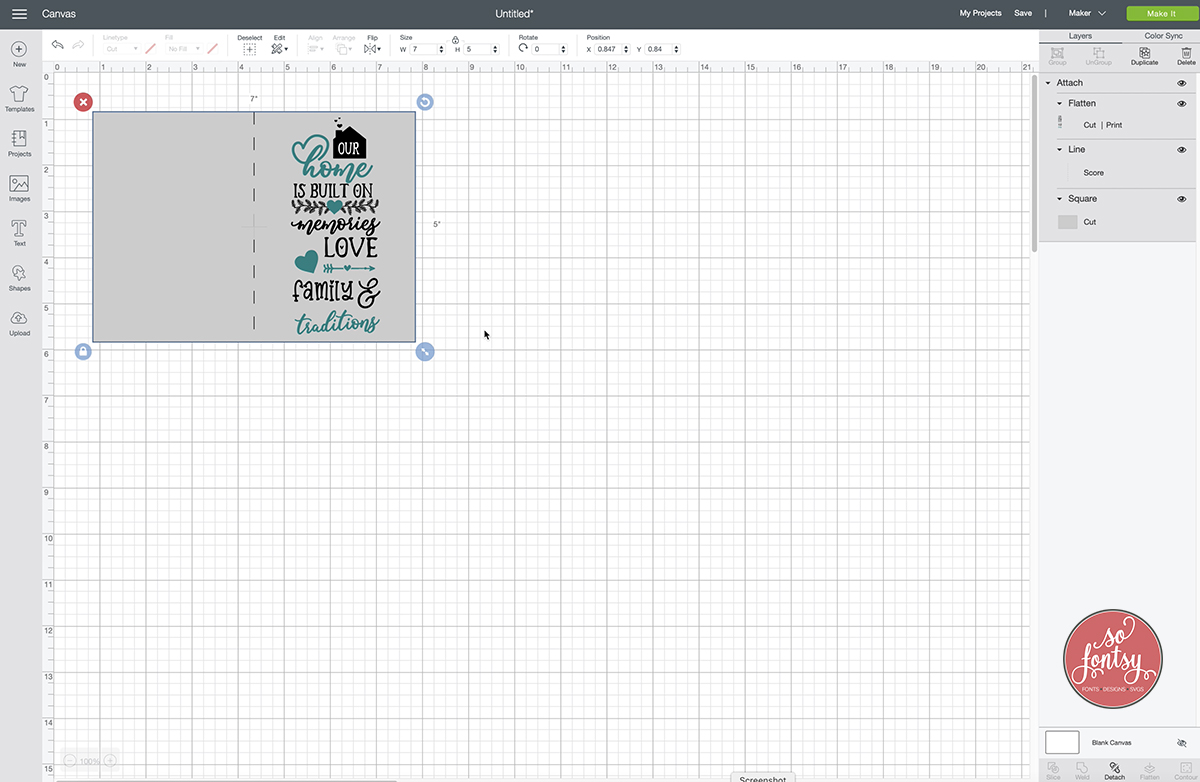
Once your design is aligned the way you prefer, select all of the layers (the print layer, the card & the score line) and click: ATTACH.
This makes the design stay together and you can resize or duplicate as needed for your project.
Now click MAKE IT. Here you will see the registration marks around your design. Click Continue.
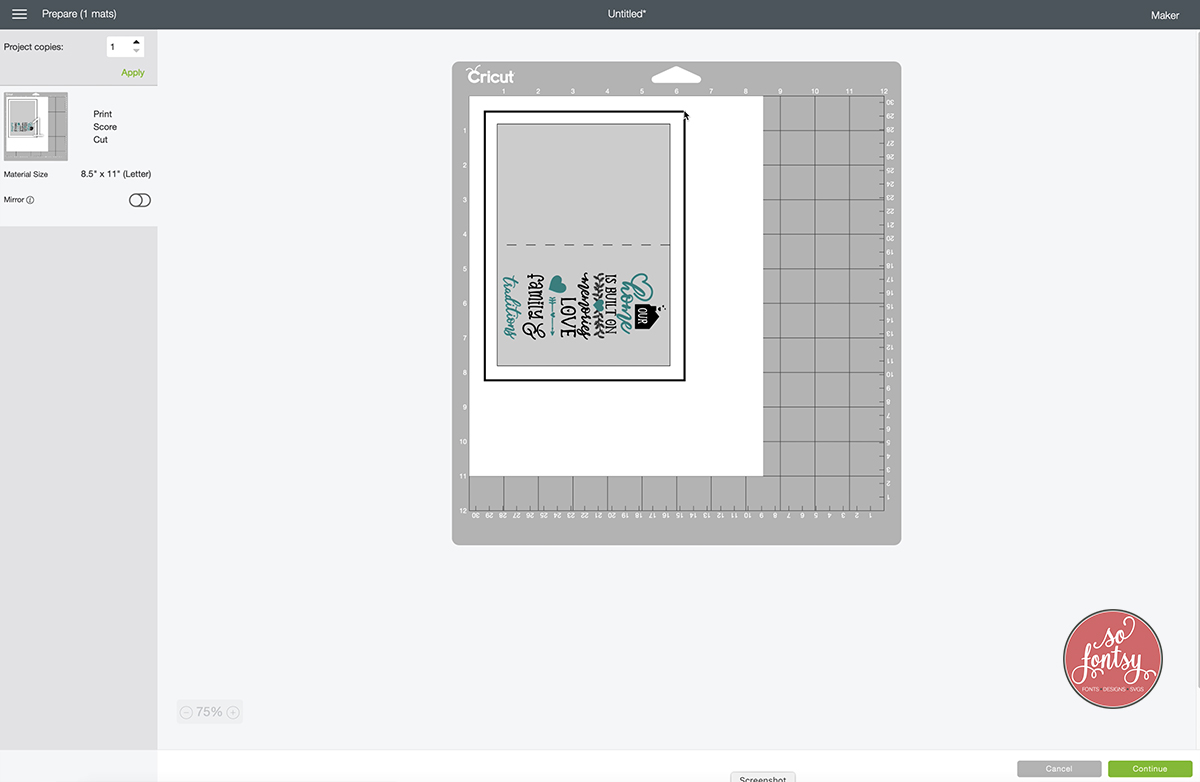
It is now time to send the design to the printer. Load your card stock into your printer and click SEND TO PRINTER.
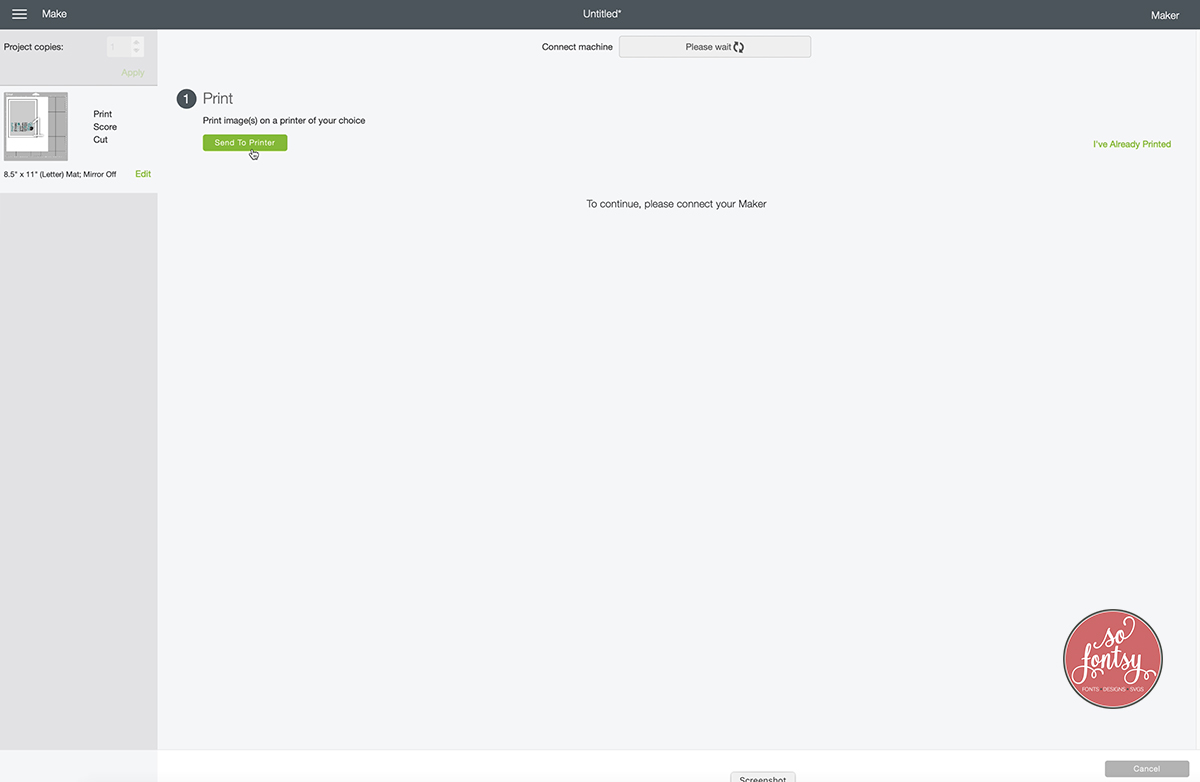
Ok now choose your printer and make sure it is set to print "ACTUAL SIZE".
Bleed rules: If you are cutting a printed design by itself, leave the bleed on.
If you are cutting a printed design attached to a card or background, turn off the bleed.
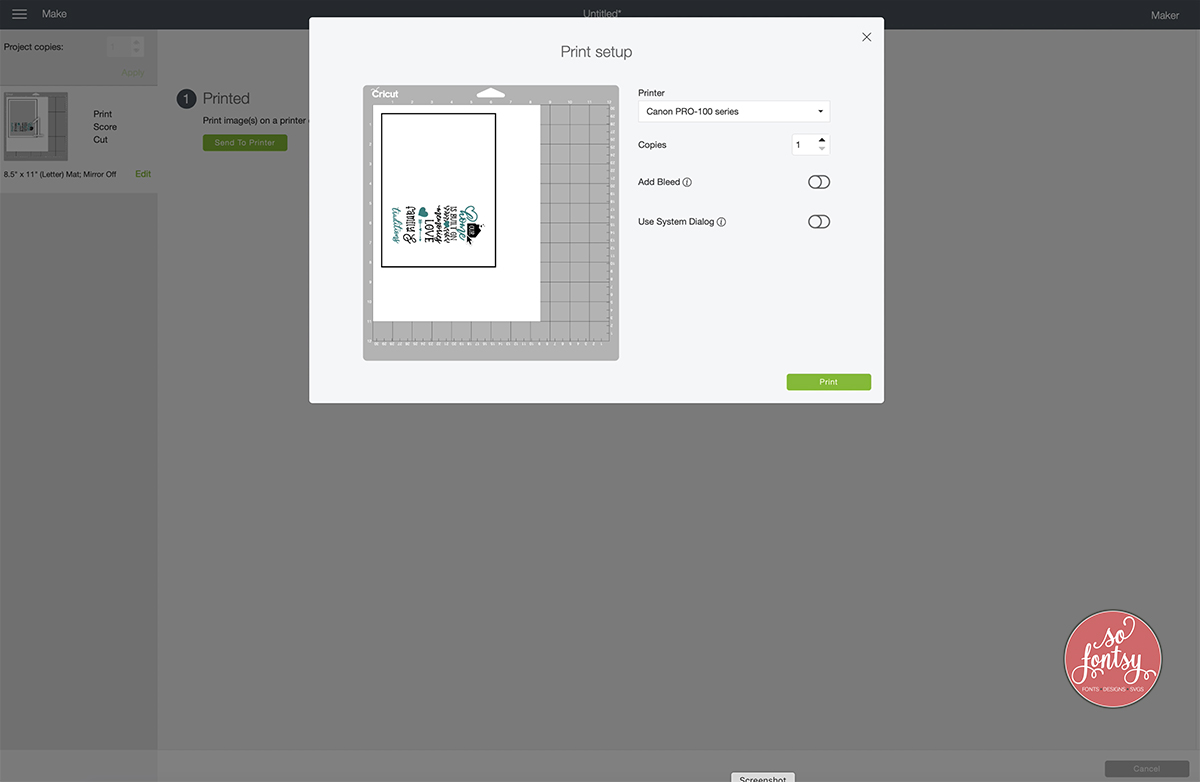
Now your project will be sent to your printer.
When it is finished printing, place on your Cricut mat in the top left corner, aligned to the ruler.
Helpful tip: use a lightweight mat.
Load the mat & cut out the design! Easy peasy!
Check out our video tutorial on the So Fontsy Cricut YouTube Channel to learn more:
Be sure to sign up for our newsletter to receive weekly tutorials & FREEBIES:


