
Cricut Design Space: How To Cut Out Designs Larger Than The Mat

Cricut Design Space: How To Cut Out Designs Larger Than The Mat
Do you want to create & cut out a project in Design Space that is larger than your 12 x 12 or 12 x 24 Cricut mat?
Some examples of where this technique will come in handy include large vinyl wall quote for your kitchen wall, a giant character for your child's birthday or even a wall mural.
Today we are going to learn how to set up larger-than-the-mat designs in Cricut Design Space and cut them out using your Maker or Explore.
How do I cut out projects that are larger than my 12 x 24 mat?
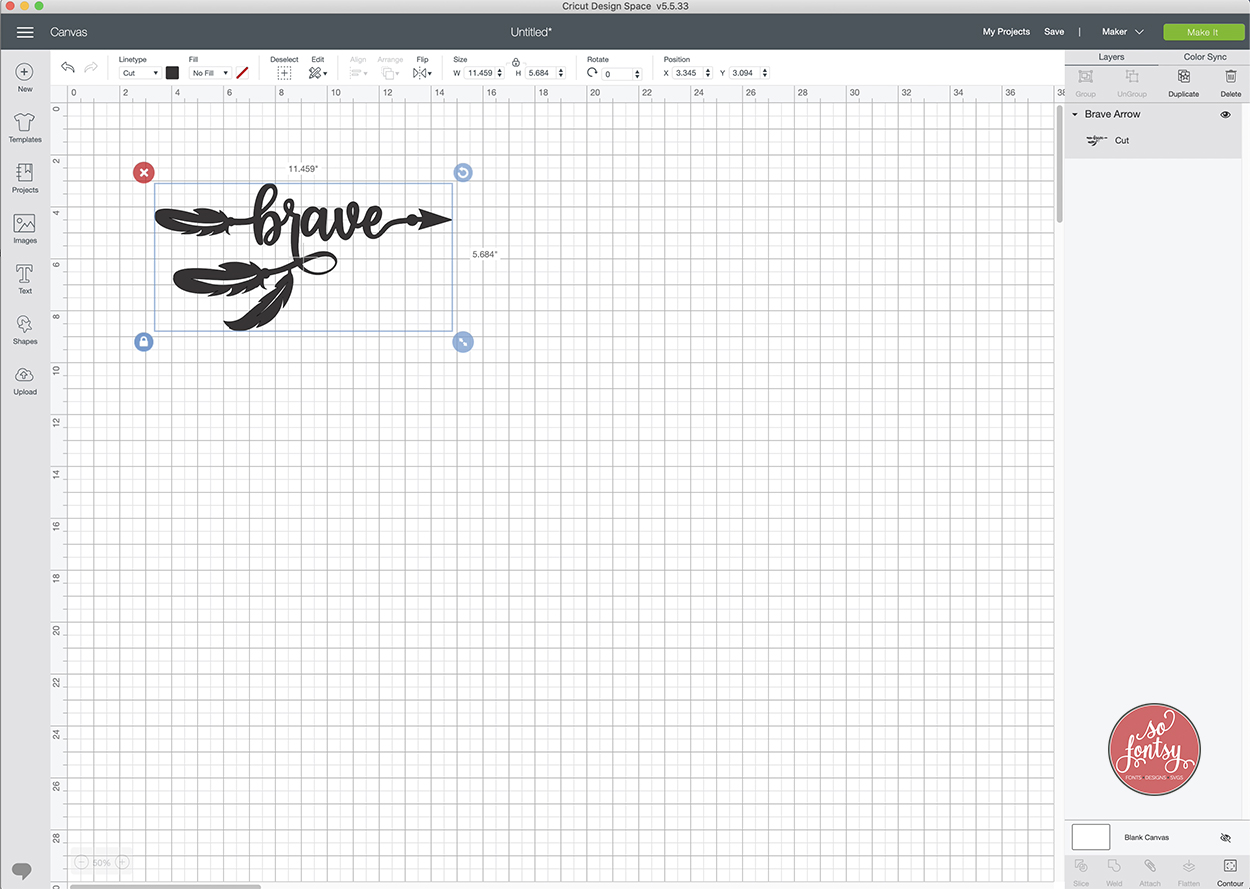
First, let's upload our design into Cricut Design Space.
I am using the Brave Arrow from the March 2020 Bundle. This HUGE bundle of designs & fonts is one of my favorite this year! There are so many designs you could use to test out this technique but these Boho Arrow Words are my favorite and they cut beautifully.
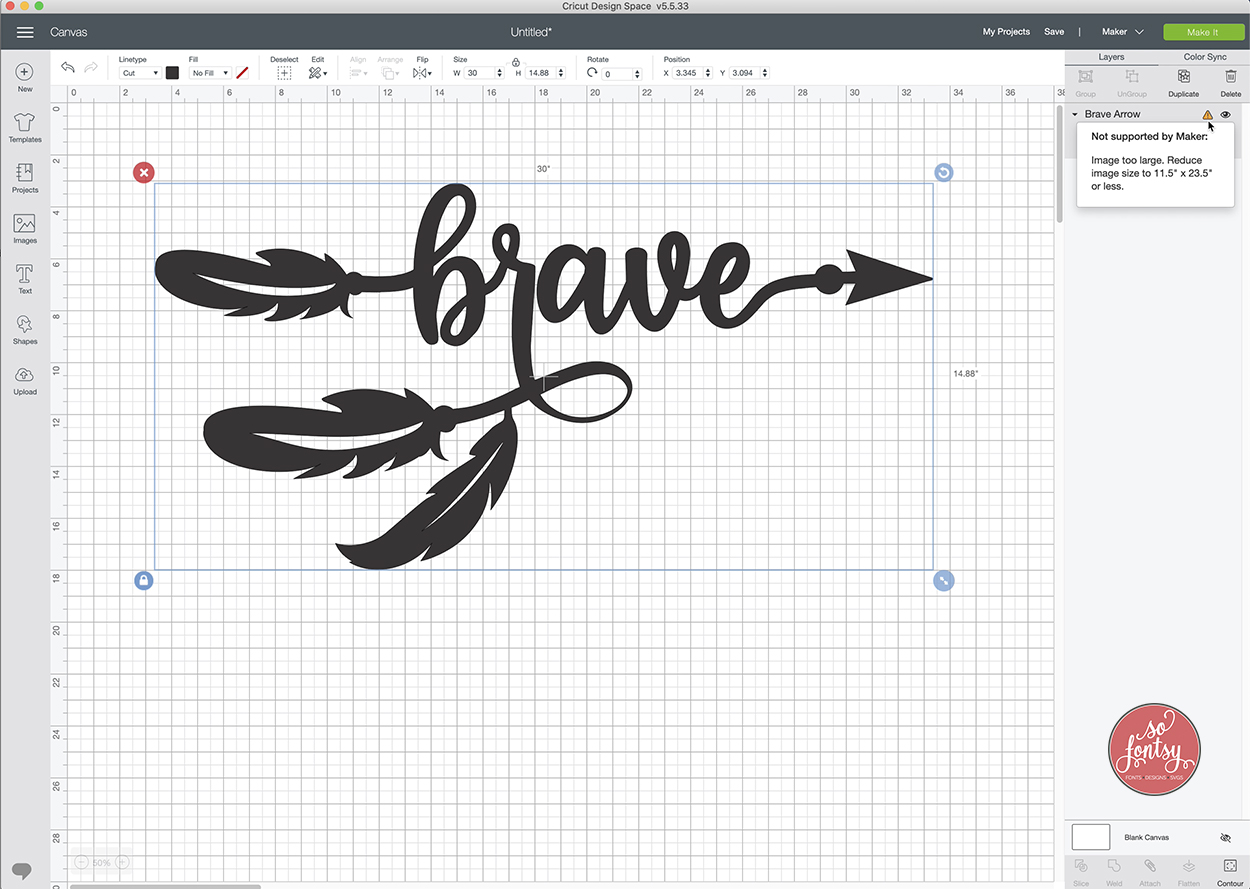
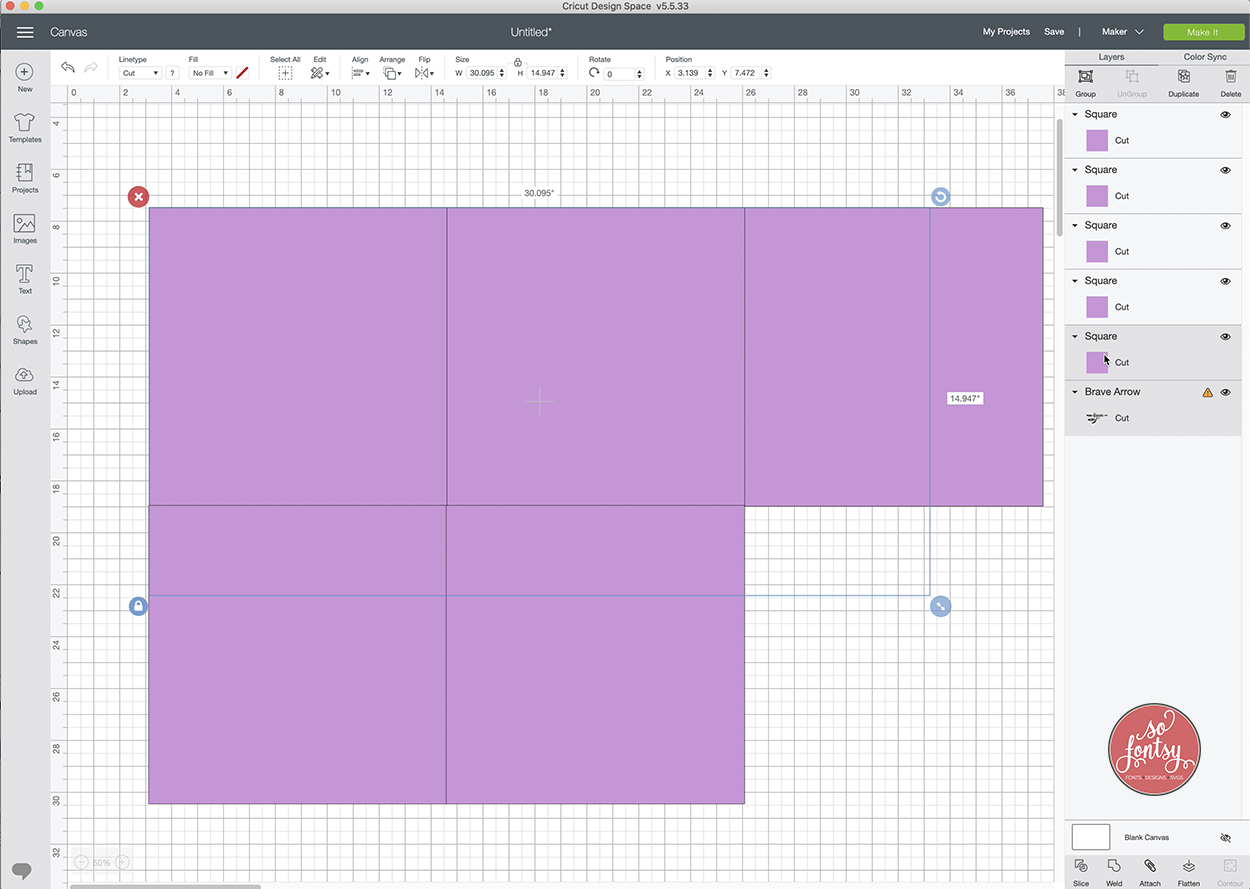
Let's resize the design to fit my project surface, which is poster board. I changed the width to 30".
Tip: Be sure to measure the area where you plan to place the design before you make the cut, so you don't waste any vinyl/paper.

You will see the orange warning display on your layer. It is telling you that the design will not fit onto the mat. That's what we are going to fix ;)
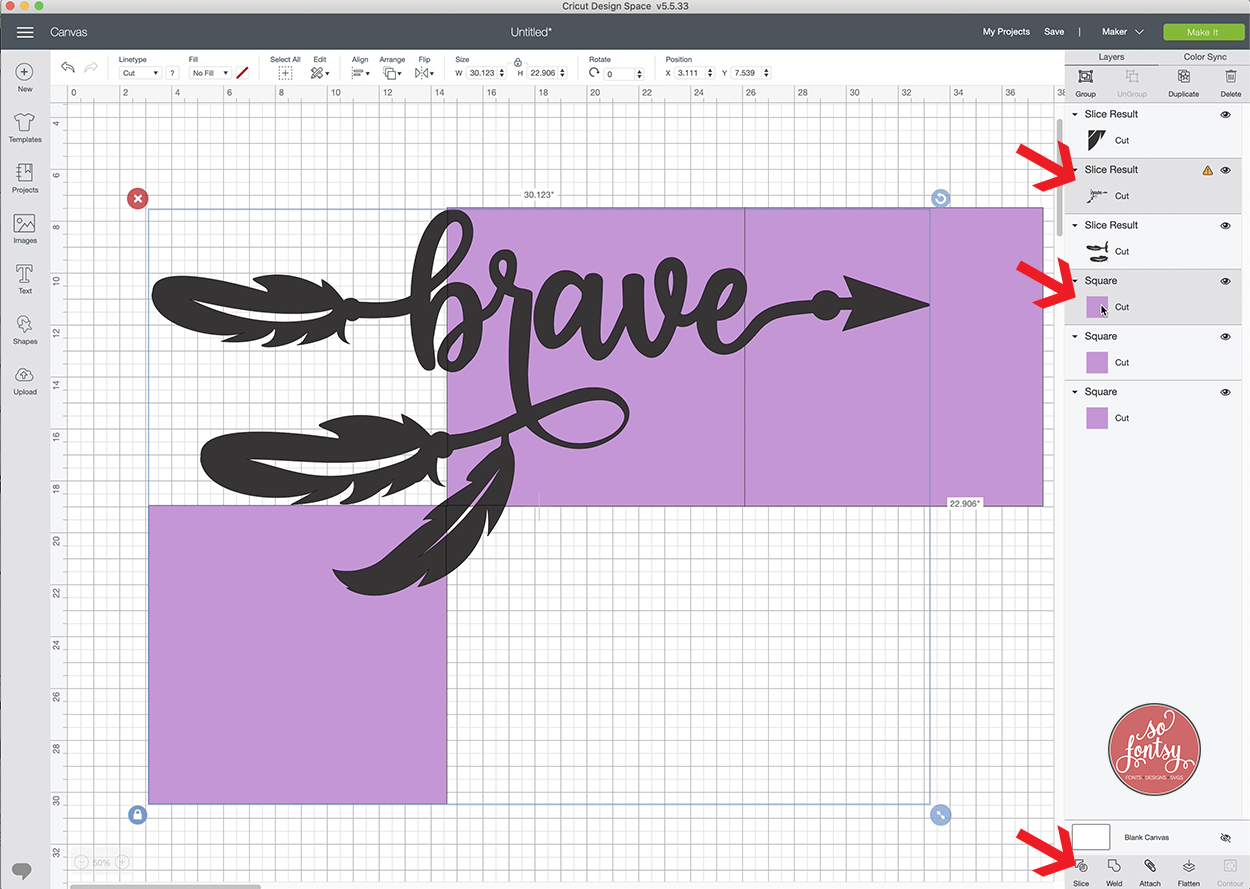
Create a square that is 11.5" x 11.5".This is the cuttable size of a 12x12 mat.
Change the color to something different than your design.
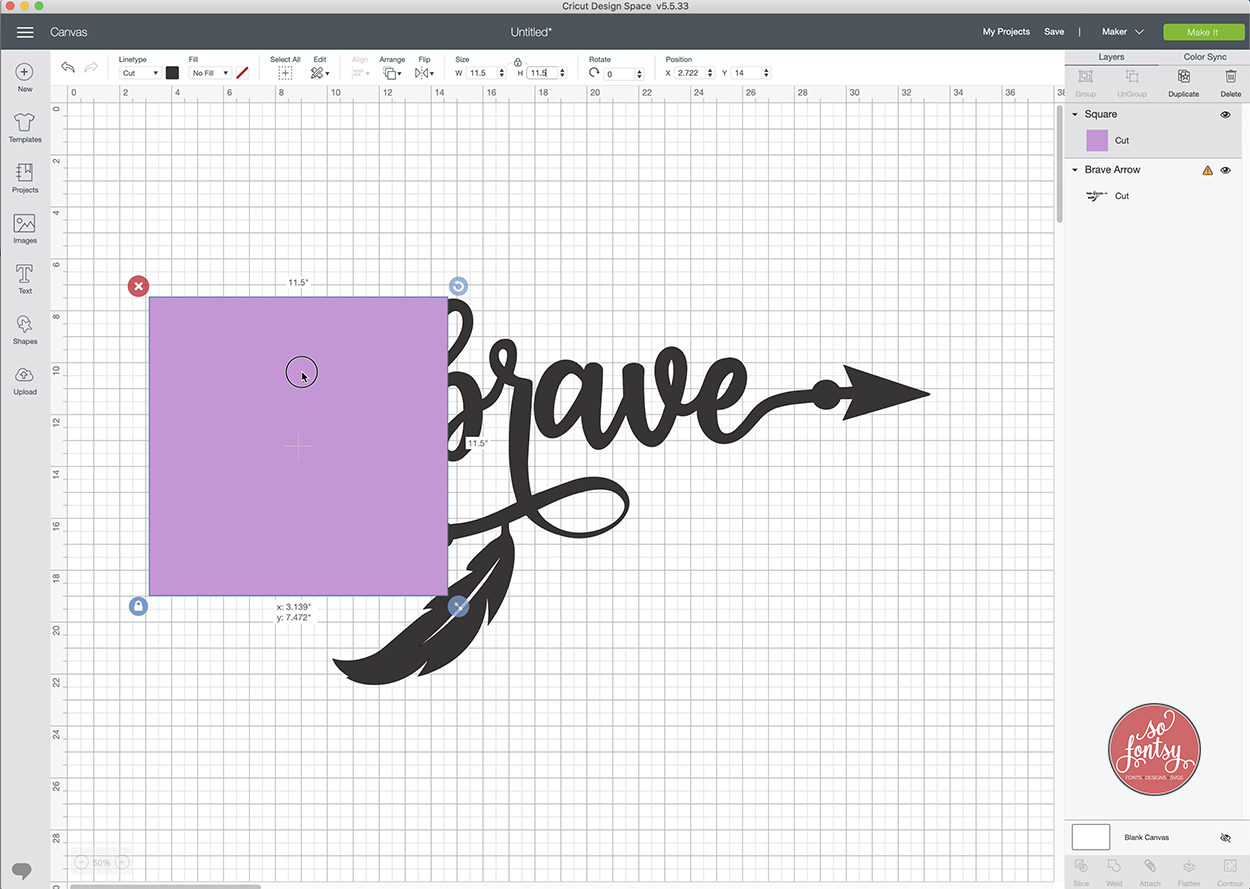
You will need enough squares to cover your design.
I duplicated the square so I had 5 copies and covered all of the Brave Arrow design.
Be sure the squares overlap a little and there are no gaps.
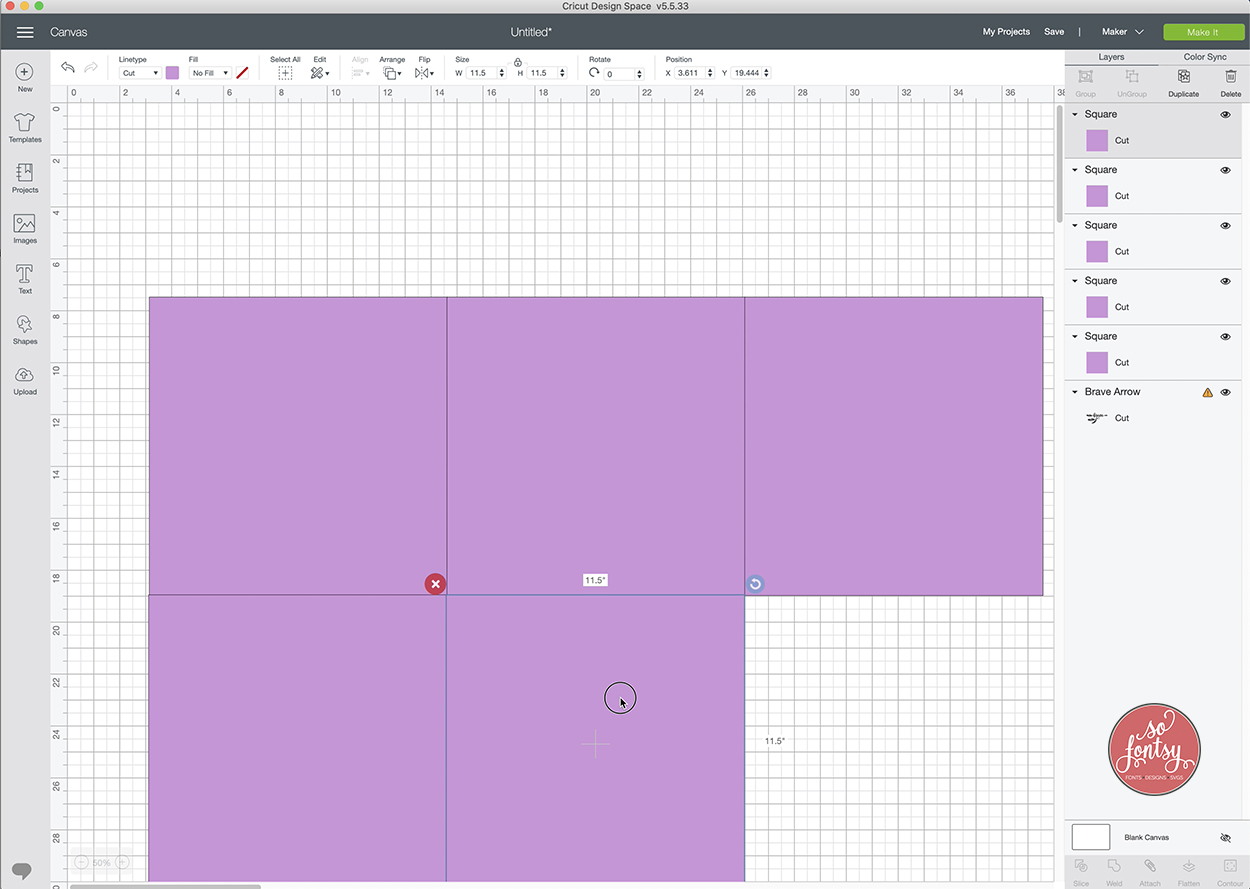
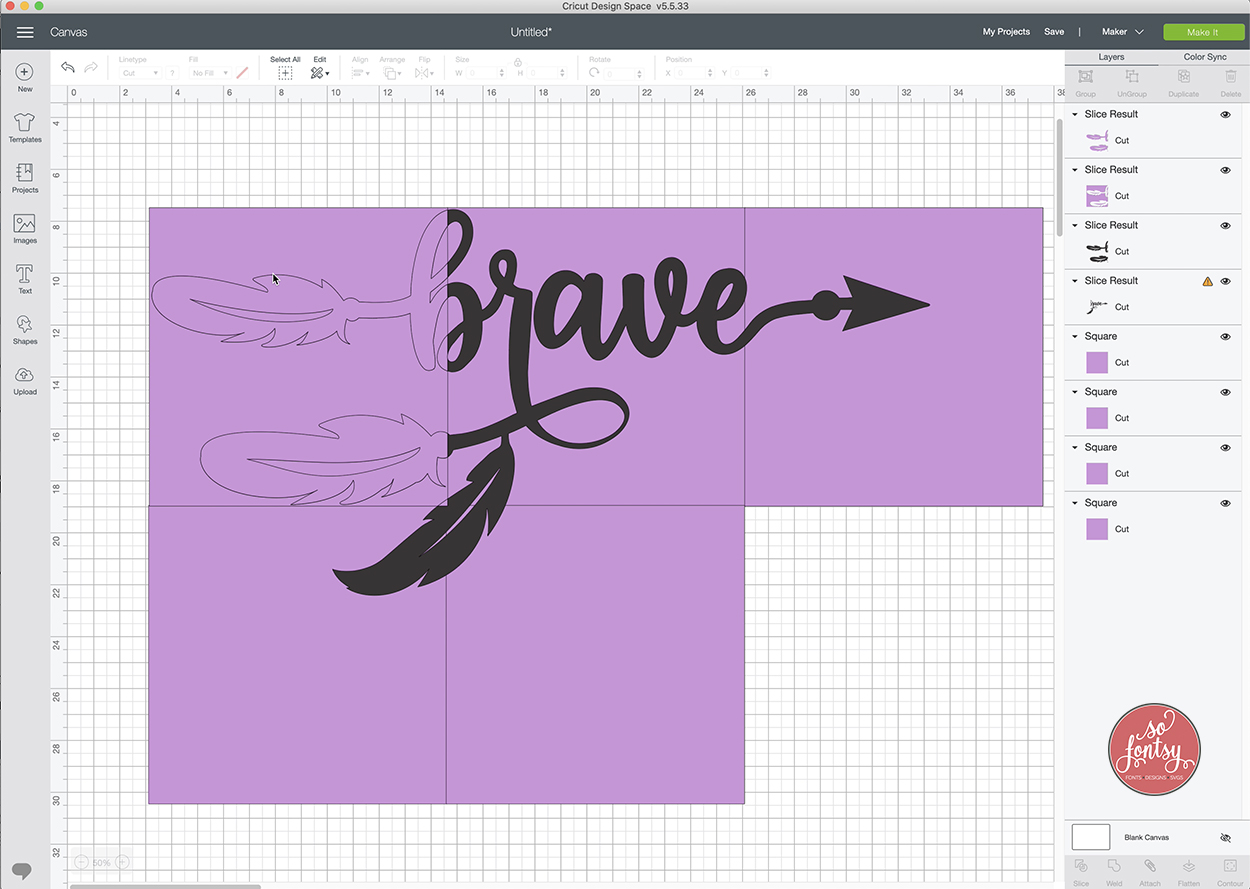
Now it's time to slice!
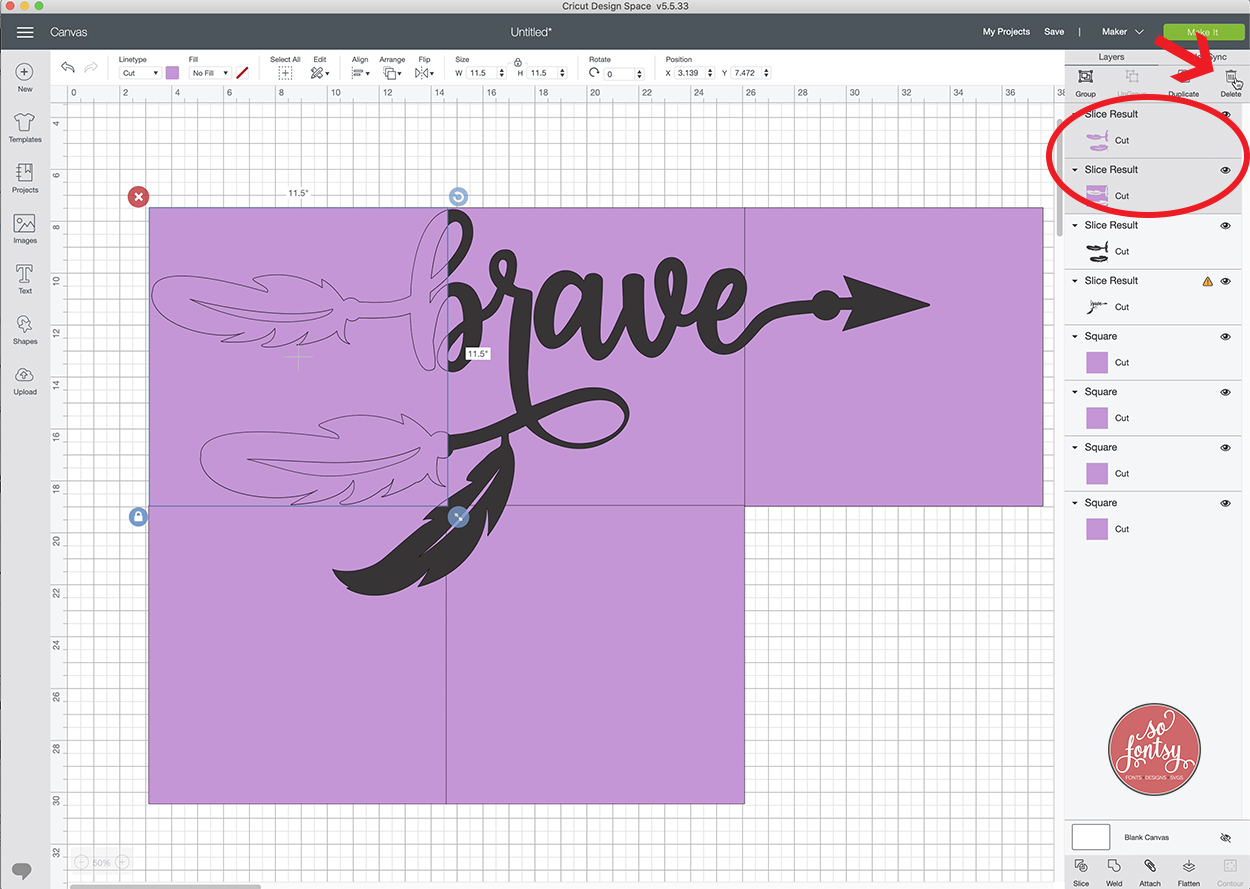
Important tip: The Slice Tool only works when 2 layers are selected. If it is greyed out, that means more than 2 layers are selected.
From the layers panel, select the Brave Arrow design & one square.
Click Slice.
Delete the colored pieces and leave the original colored layer.
Select the next solid square & the original Brave Arrow layer.
Click Slice.
Delete the colored pieces and leave the original colored layer.

Select the 3rd solid square & the original Brave Arrow layer.
Click Slice.
Delete the colored pieces and leave the original colored layer.
Follow the same steps above for the remaining squares:
Select the 4th solid square & the original Brave Arrow layer. Click Slice. Delete the colored pieces and leave the original colored layer.
Select the last solid square & the original Brave Arrow layer. Click Slice. Delete the colored pieces and leave the original colored layer.
Now you will have 5 layers remaining that are the original design, just sliced into pieces.
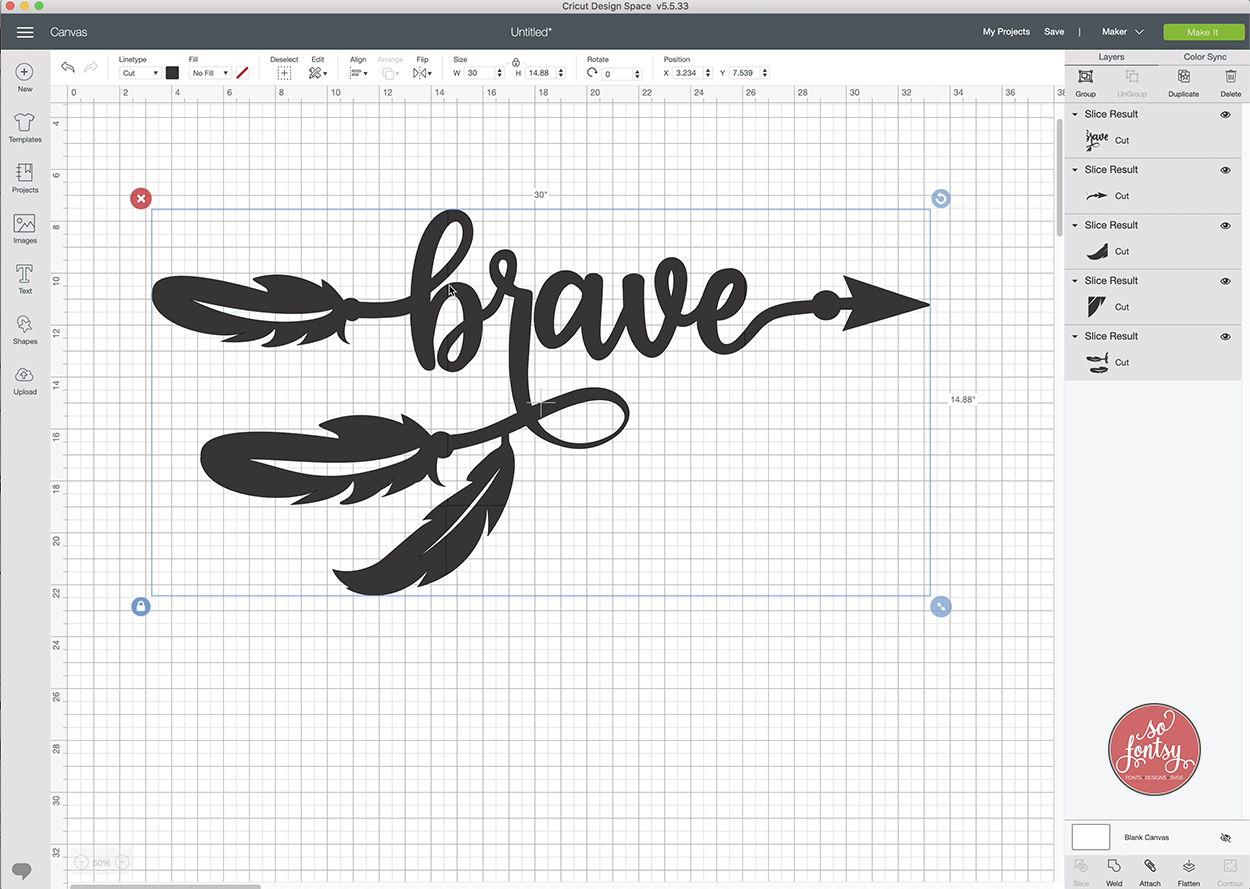
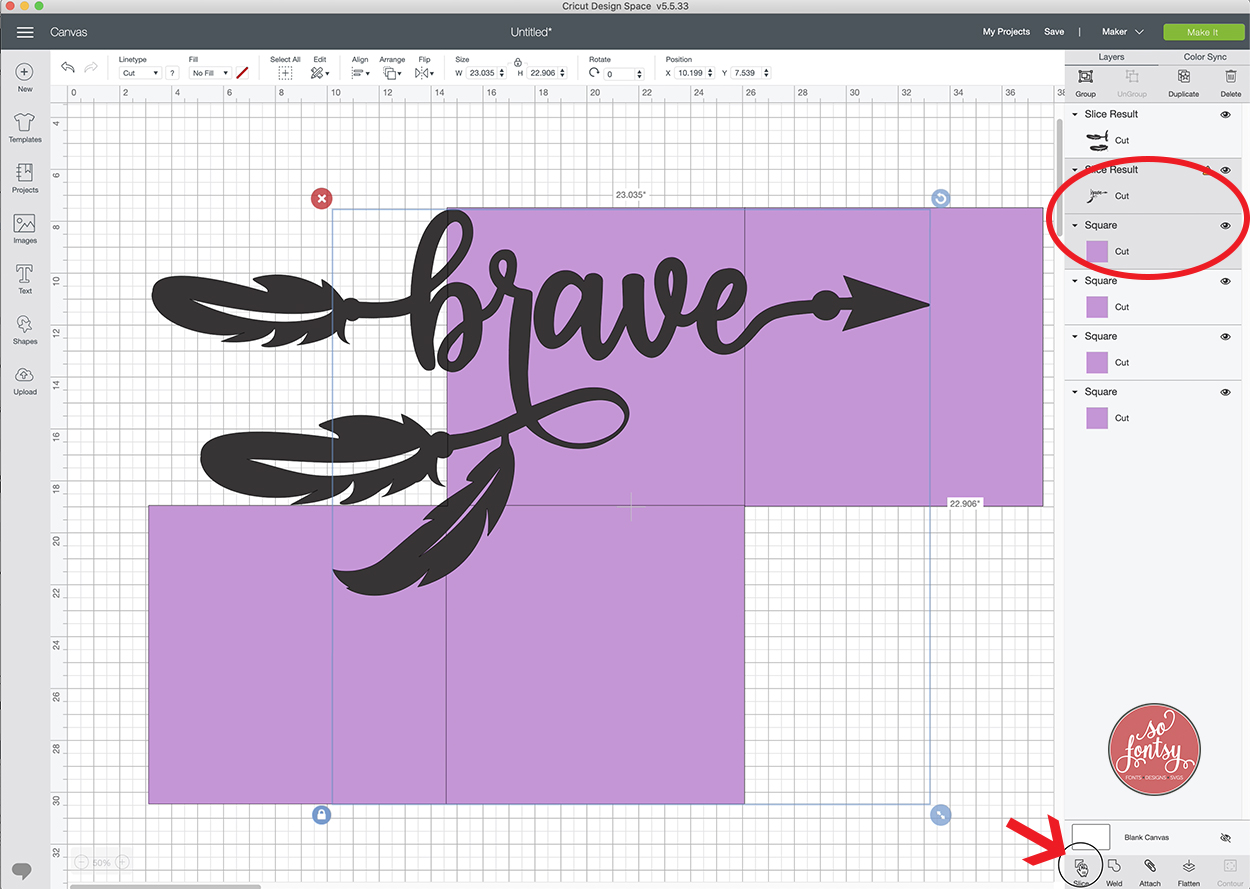
Click Make It.
This will place all of the pieces onto several 12x12 mats. In this case, there are 3 mats.

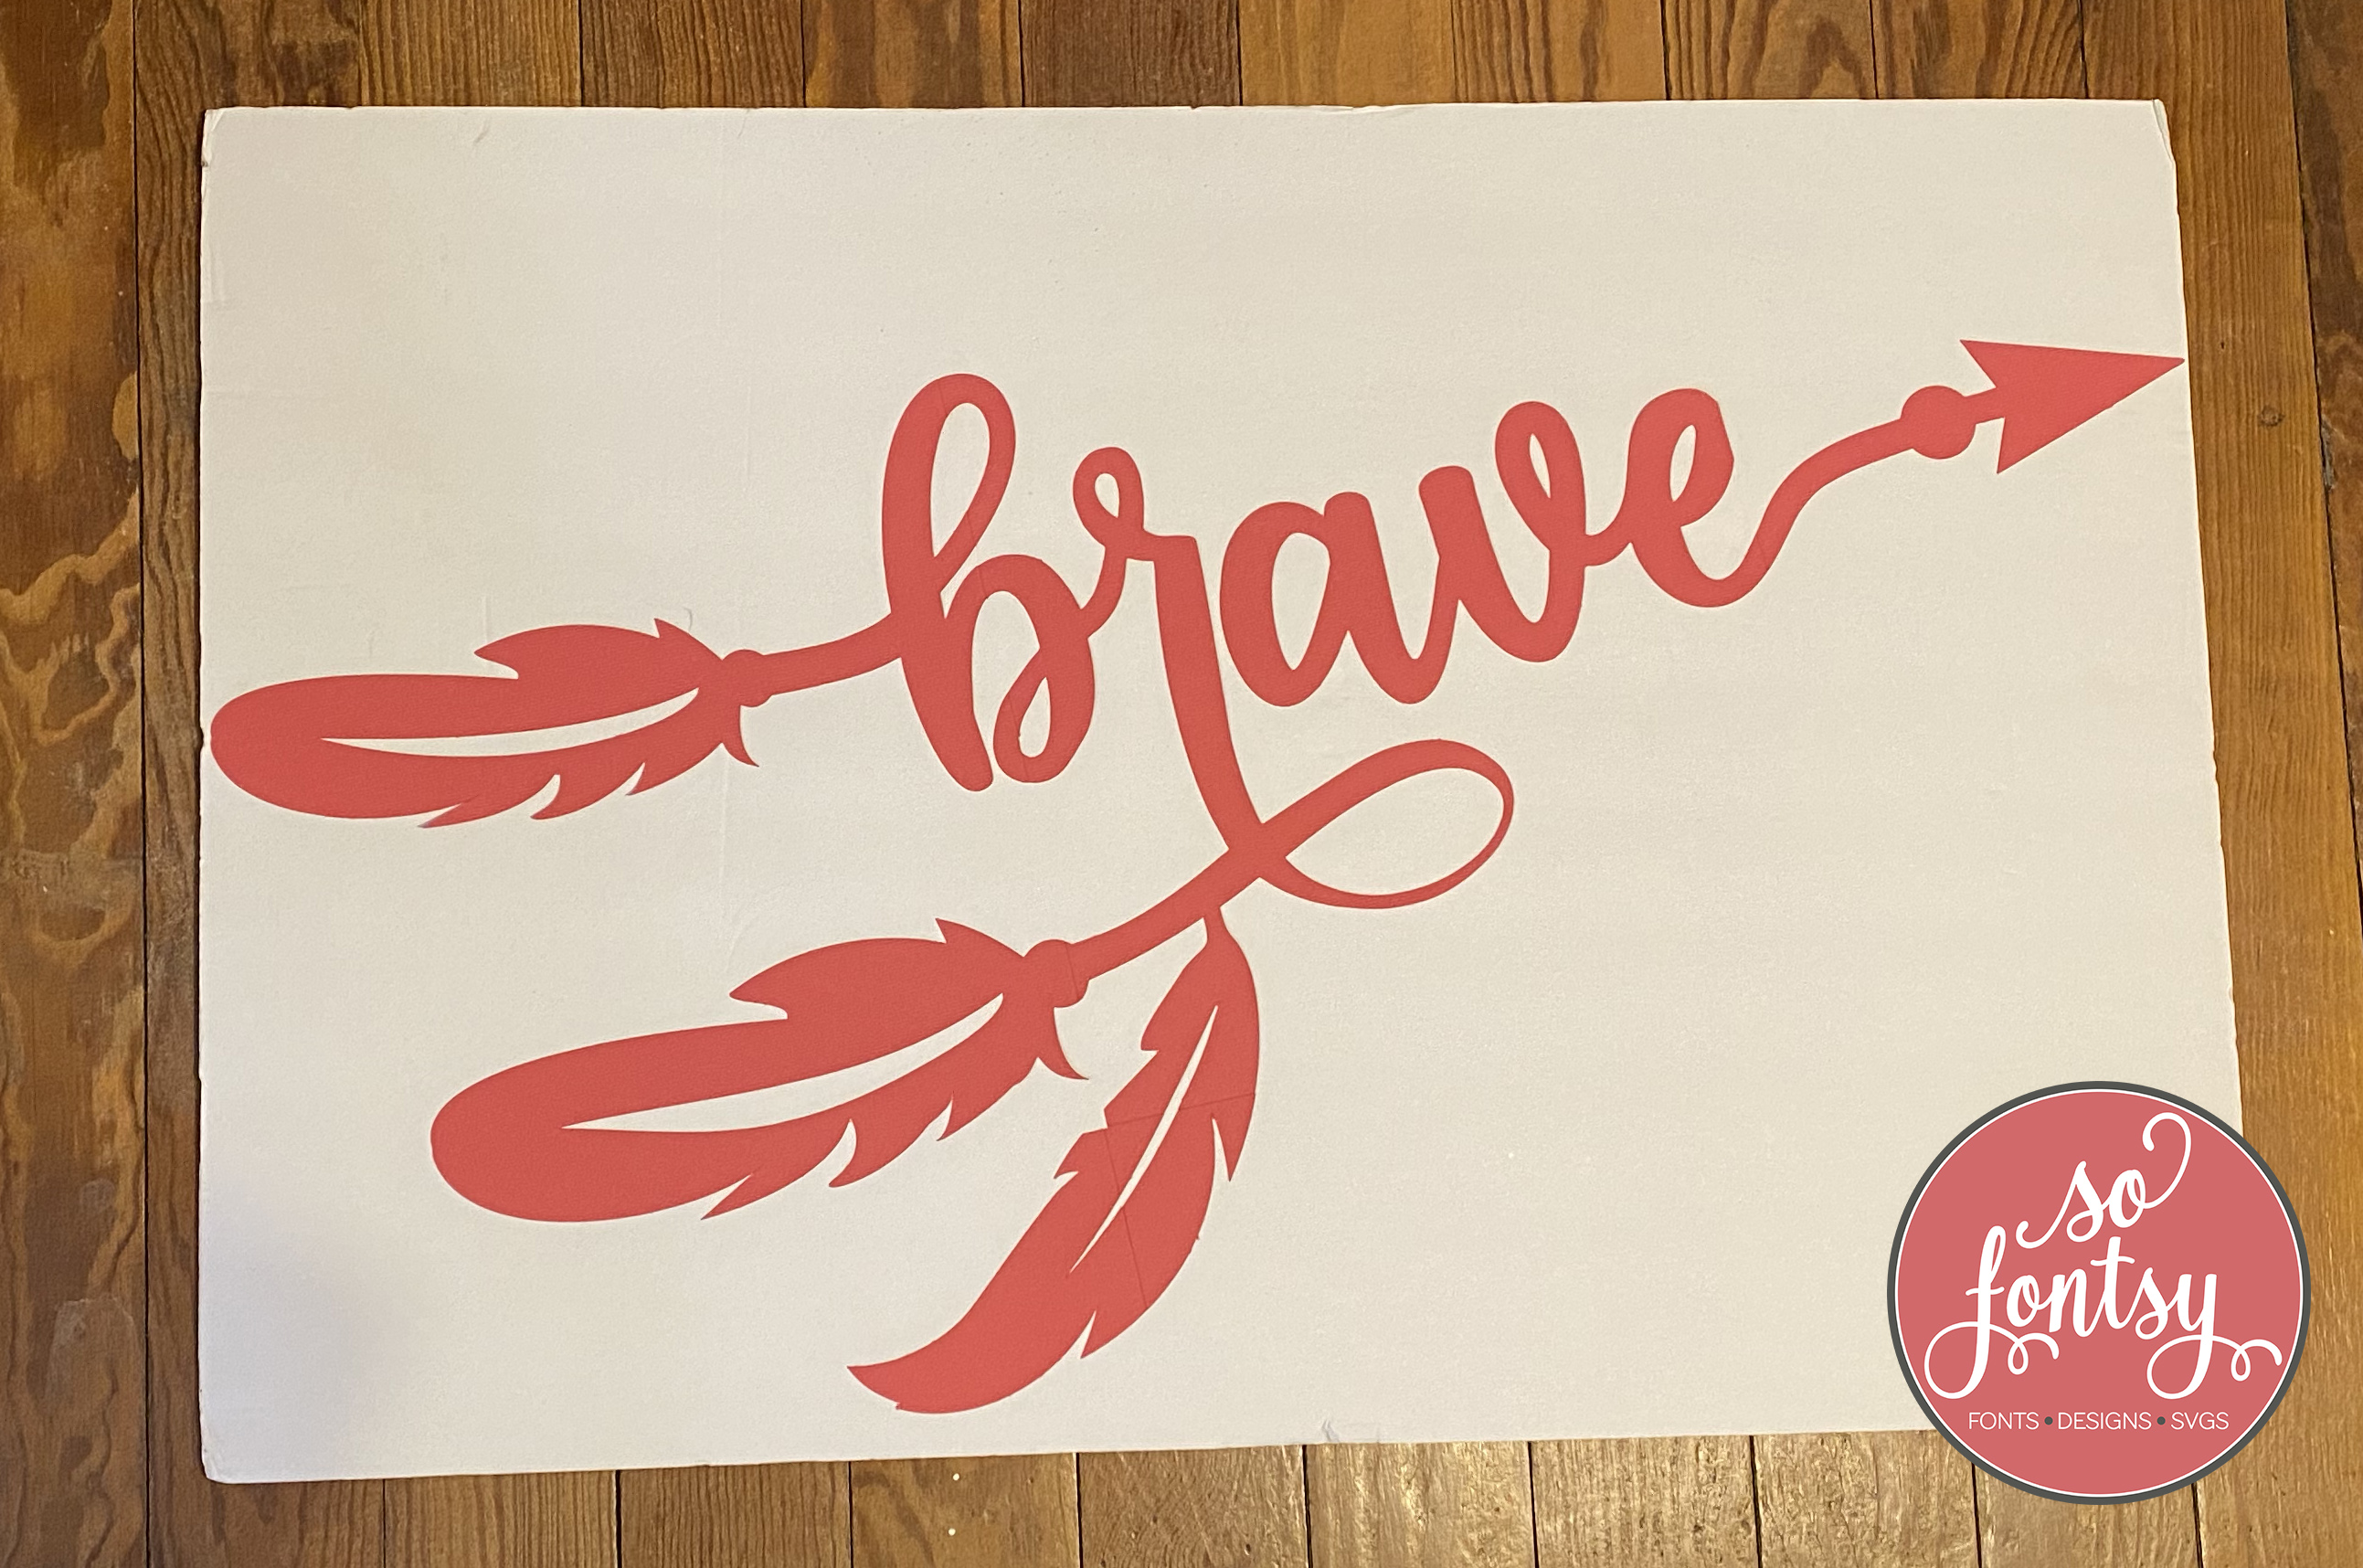
Now send to your machine & load each mat when prompted. Weed & assemble your pieces, like a puzzle.
Awesome job!
This is my finished project on a poster board:
Here is a video tutorial for my fellow visual learners:
Now it's time for YOU to cut a project larger than the Cricut mat!
Be sure to subscribe to the So Fontsy Cricut YouTube Channel so you don't miss any of our videos!
Be sure to sign up for our newsletter to receive weekly tutorials & FREEBIES:


