DIY Pillow: Print on Fabric with Inkjet Printer

In this tutorial, we'll show you how to create your own pillows using printed fabric.

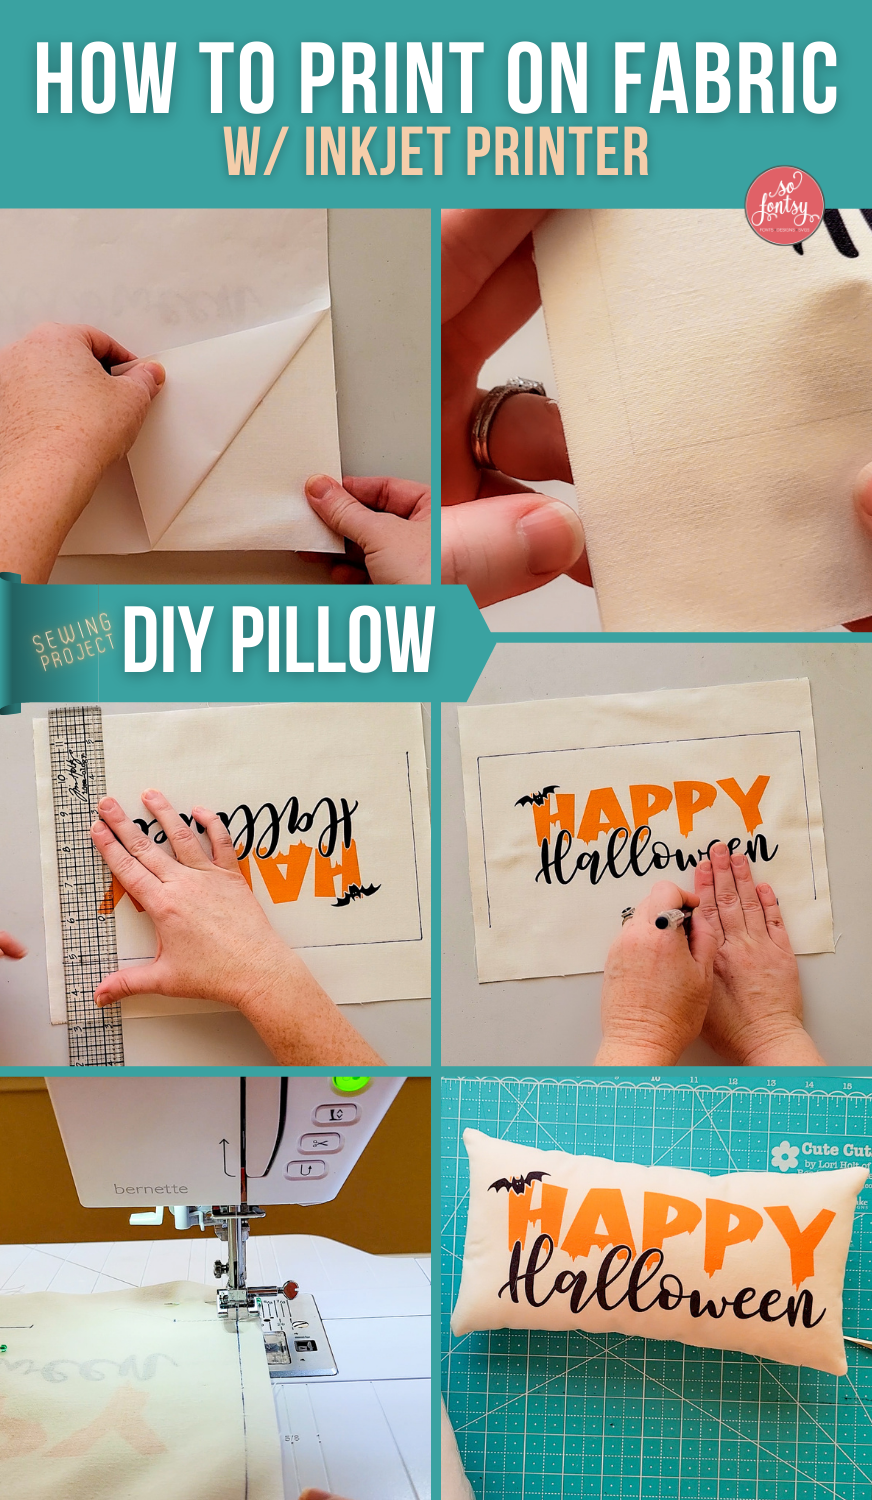
Our Happy Halloween svg design can be found in the Fall Farmhouse Font and SVG Bundle.

Open your design software – we're using Silhouette Studio.
Create a rectangle around the design in a light grey color.

Print the design using the freezer paper method – which you can read more about HERE.

Remove the freezer paper:

Using a heat erasable FriXion Pen and straight edge, darken the rectangle around the design. Darken it enough so that you can see it from the backside of the fabric. Leave a hand space along the line – this is the area where you will stuff the pillow.


Place the pillow sides face to face and pin into place.


Place the pillow sides face to face and pin into place.

Using the marked lines, use your sewing machine to sew around the rectangle except in the "no sew zone”.

Using a rotary cutter, trim 1/4 inch outside the rectangle. This is your seam allowance. Clip the corners to reduce bulk.


Turn your pillow insert right side out and use Polyfil stuffing to stuff the pillow.

Along the "no sew zone," fold in the 1/4 inch seam allowance. Close the pillow by hand stitching or apply permanent fabric tape.


And now your pillow is now finished!

You can find the design we printed for this pillow, in the Fall Farmhouse Font and SVG Bundle.

Watch the project video below:
PIN it for later: